How to Find Fish From a Boat With a Fish Finder
There’s nothing quite as frustrating as heading out onto the beautiful waters of Virginia, loaded with all your gear, and feeling completely lost when it comes to finding fish. You know they're out there, lurking somewhere beneath the surface of the James River or perhaps deep within the expansive Smith Mountain Lake, but how do you actually find them from your boat? This guide is here to unravel the mystery of fish finders, helping you understand how to use this invaluable tool to pinpoint fish, identify promising structures, and ultimately, bring more fish to the net.
Understanding Your Fish Finder: The Basics
Before you can start reeling in those lunkers, it’s essential to grasp the fundamental principles behind your fish finder. It’s not just a fancy screen; it’s a sophisticated piece of technology designed to show you what’s happening beneath your boat, transforming guesswork into informed decisions.
How Sonar Technology Works
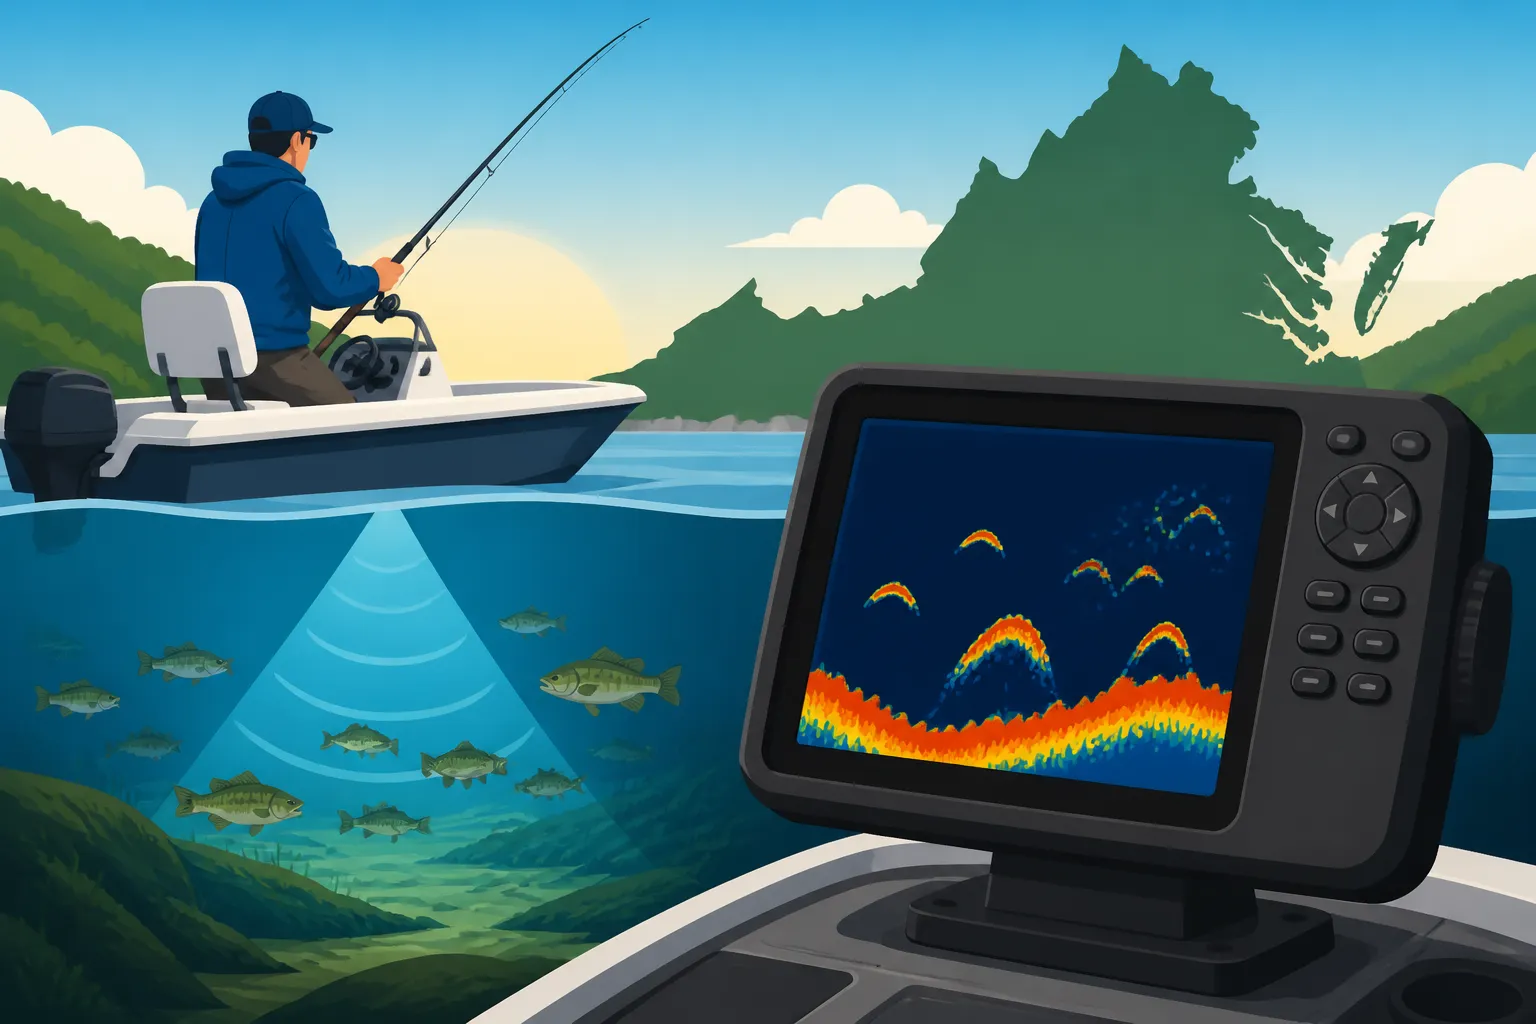
At its heart, a fish finder operates on sonar (SOund Navigation And Ranging) technology. Think of it like a bat echolocating in the dark. Your fish finder's transducer, typically mounted on the transom or hull of your boat, sends out sound waves—pings—down into the water column. These sound waves travel until they hit something: the lake bottom, a submerged tree, a school of baitfish, or perhaps that trophy largemouth bass you’ve been dreaming of.
When these sound waves encounter an object, they bounce back as echoes to the transducer. The fish finder then precisely measures the time it took for the sound wave to travel down and back up. Since sound travels at a known speed in water, the device can calculate the exact depth of the object that produced the echo. It’s a marvel of engineering, constantly sending out and receiving these signals, painting a real-time picture of the underwater world on your screen. The stronger the echo, the denser or larger the object, which is why a hard bottom often appears as a thicker line than a soft, silty bottom.
Types of Fish Finders: From Basic to Advanced
The world of fish finders offers a spectrum of options, catering to every budget and angler's need, from the casual weekend warrior to the serious tournament angler navigating waters like those detailed in our guide to Claytor Lake's Diverse Virginia Fish Species Guide.
Basic fish finders usually feature a simple 2D sonar display, showing you a traditional view of the water column directly beneath your boat. These are excellent for getting started, providing clear fish arches and bottom contours. As you move up the ladder, you'll encounter models with more advanced capabilities. Down Imaging (sometimes called DownScan or DownVü) provides a picture-like view directly below, making it easier to distinguish structure like trees and rock piles from actual fish. Side Imaging (or SideScan/SideVü) takes it a step further, scanning out to the sides of your boat, giving you an almost photographic view of the bottom and structure up to hundreds of feet away. This is incredibly useful for scouting large areas quickly, say when you're looking for productive points or submerged humps on Smith Mountain Lake Fishing Guide. Some high-end units combine all these technologies, often integrated with GPS mapping, making them truly powerful tools for exploring new waters or dissecting familiar ones. You can often find a wide array of options, from entry-level to professional-grade, on platforms like Amazon.
Mounting and Initial Setup
Getting your fish finder properly mounted and set up is crucial for accurate readings. The transducer is the most critical component here. It needs to be submerged and have an unobstructed view of the water below. For most recreational boats, a transom mount is common, where the transducer is attached to the boat's stern. It's vital that it's positioned correctly – not too high, not too low, and free from turbulent water caused by your motor or hull, which can lead to "noise" or false readings on your screen.
Once the transducer is in place, connecting the display unit and power source is usually straightforward. The initial setup involves basic settings like frequency, sensitivity, and chart speed. Many modern units come with auto-settings that do a decent job to start, but learning to fine-tune these manually can unlock your fish finder's full potential. For instance, adjusting sensitivity allows you to pick up fainter echoes, which might mean spotting smaller baitfish or fish in dense cover, especially useful when targeting species like crappie or panfish in murkier waters. It’s worth taking the time to read your specific unit’s manual, even if it feels like reading a textbook, because those details can make all the difference in understanding what you’re seeing on the screen.
Interpreting the Sonar Display: What You're Seeing
The real magic happens when you learn to translate the lines, arches, and blobs on your screen into tangible information about the underwater world. It’s like learning a new language, and once you become fluent, your fishing success will undoubtedly improve.
Identifying Fish Arches and Marks
Perhaps the most iconic image on a traditional 2D sonar display is the "fish arch." When your boat moves over a fish, the sound waves hit it from different angles as the fish enters and then exits the sonar cone, creating that distinctive curved shape. A thick, well-defined arch usually indicates a larger fish, while smaller, thinner arches or even simple dots often represent smaller fish or baitfish schools. The depth of the arch tells you exactly how deep the fish is in the water column. If you see a cluster of small arches or a cloud-like blob, you've likely found a school of baitfish, which are often indicators of larger predatory fish nearby, as covered in our guide to Best Time of Year for Bass Fishing in Virginia.
However, not every mark is a fish. Sometimes, debris, air bubbles, or even a sudden change in depth can mimic a fish signal. The key is to look for consistency and context. Are the arches suspended freely in the water, or are they hugging the bottom? Are they near a prominent structure? Understanding the typical behavior of the fish you're targeting – for instance, how Virginia Bass Fishing: Largemouth, Smallmouth, Spotted, and Alabama Bass tend to relate to cover – helps you differentiate real fish from false alarms.
Reading Structure and Bottom Composition
Fish love structure. It provides cover, ambush points, and often holds baitfish. Your fish finder is your best friend for identifying these crucial elements. On a 2D sonar, structure like submerged trees, rock piles, or old roadbeds will appear as irregular shapes and spikes rising from the bottom. The return signal's thickness and intensity will also tell you about the bottom's composition. A hard bottom, like rock or gravel, will produce a strong, thick return, often appearing as a bright, crisp line. A soft bottom, such as mud or silt, will show a fainter, thinner, and often less distinct line.
Advanced features like Down Imaging and Side Imaging excel at rendering structure with incredible detail. Down Imaging can show you the individual branches of a submerged tree or the distinct edges of a rock pile, looking almost like a photograph. Side Imaging allows you to scan wide areas, revealing sunken boats, brush piles, or ledges that you might have otherwise missed while passing directly over them. This is especially useful when scouting new areas or trying to locate less obvious spots, such as those remote coves mentioned in our Best Fishing Spots in Virginia guide. Knowing where the structure is allows you to make more targeted casts and spend less time fishing "dead water."
Understanding Water Column Details
Beyond fish and structure, your fish finder can reveal important details about the water column itself. You might see distinct horizontal lines across your screen that aren't fish; these are often thermoclines. A thermocline is a layer of water where the temperature changes rapidly with depth, and it's a critical factor for many fish species, especially during warmer months. Fish often suspend just above or below these layers, seeking comfortable temperatures and oxygen levels. Identifying these thermal breaks can tell you where the active feeding zone is, even if you’re not seeing many individual fish arches.
Additionally, pay attention to the overall clarity and "noise" on your screen. Excessive clutter could indicate suspended algae, debris, or even a lot of small plankton, all of which can affect how fish behave and where they hold. Understanding these subtle cues helps you build a more complete picture of the environment, allowing you to adapt your techniques, whether you’re trying to figure out How to Catch Bass in Cold Water or adjusting to warmer summer conditions.
Advanced Techniques for Locating Fish Structures
Once you're comfortable with the basics, it's time to leverage your fish finder's more advanced features to truly elevate your game. These techniques can turn a good day on the water into an unforgettable one.
Side Imaging and Down Imaging for Enhanced Views
If you have a fish finder with Side Imaging or Down Imaging capabilities, you’re sitting on a goldmine of information. Down Imaging gives you a photographic-like view directly beneath your boat, making it incredibly easy to distinguish a fallen tree from a school of baitfish. Instead of abstract arches, you'll see clear, defined images of submerged timber, rocks, and even individual fish suspended near these objects. This clarity helps you confirm exactly what kind of cover you're looking at, which is invaluable when trying to target specific species that prefer certain types of habitat.
Side Imaging, on the other hand, is a game-changer for covering water efficiently. Instead of only seeing what’s directly below, it projects sonar beams out to the sides of your boat, often hundreds of feet in either direction. This means you can scan vast areas for brush piles, ledges, or even isolated boulders without having to drive directly over them. Imagine cruising along a shoreline on Lake Anna Fishing Guide and seeing a hidden brush pile 50 feet to your left that’s absolutely loaded with crappie – without Side Imaging, you’d likely pass it by entirely. When you spot something promising, you can then navigate directly to it or cast to it from a distance, minimizing disturbance to the fish.
Using GPS and Waypoints to Mark Hot Spots
Modern fish finders often integrate GPS mapping, which is arguably as important as the sonar itself. Once you've identified a promising piece of structure, a school of fish, or a productive feeding lane with your sonar, don't just admire it – mark it! By creating a waypoint, you save the exact coordinates of that spot, allowing you to return to it again and again. This is incredibly useful for building a personal database of "honey holes" over time.
You can also use your GPS to navigate back to these waypoints with precision, ensuring you're dropping your bait exactly where the fish are. Plotting a course to troll a specific depth contour or along a productive drop-off becomes much easier when you can see your boat's position relative to your saved waypoints and the mapped topography. For serious anglers, this combination of precise navigation and detailed underwater imaging is what truly unlocks the potential for consistent success, especially when you're focusing on fishing techniques after a cold front where fish might be lethargic and tightly grouped.
Targeting Specific Species with Depth and Structure
Different fish species have different preferences for depth, water temperature, and types of structure. Your fish finder helps you understand these relationships and target your desired catch more effectively. For instance, if you're chasing Virginia Bass Fishing: Largemouth, Smallmouth, Spotted, and Alabama Bass, you might learn that largemouth often relate to shallow, dense cover like hydrilla beds or submerged timber, while smallmouth prefer rocky areas, humps, and current-swept ledges in deeper water. Your fish finder will reveal these specific habitat types.
Similarly, if you're trying to figure out How to Catch Bass From a Boat in Deep Water, your sonar can show you bass suspended over deep-water points or congregating around offshore brush piles. Seeing these fish on your screen at a particular depth allows you to present your lures accordingly, whether you're dropping a jig or slow-rolling a spinnerbait. For panfish like crappie, you'll often see them congregated tightly around brush piles or standing timber. By observing where fish are holding, you can tailor your approach – be it casting a plastic worm, jigging vertically, or dropping live bait right into the strike zone.
Troubleshooting and Maximizing Your Fish Finder's Potential
Even the best technology can have its quirks. Knowing how to troubleshoot common issues and fine-tune your settings will ensure you get the most out of your fish finder every time you hit the water.
Common Issues and Quick Fixes
It’s inevitable: at some point, your fish finder might start acting up. Perhaps you're getting a lot of "noise" or false readings, or the screen seems to freeze. The first thing to check is almost always the transducer. Is it clean? Is it properly submerged? Even a thin layer of grime or a small weed caught on the transducer face can significantly impede its performance. Check its mounting to ensure it hasn't shifted and is still sending signals straight down.
Another common issue is electrical interference. This can come from your boat's motor, other electronic devices, or even poorly wired accessories. Try turning off other electronics one by one to isolate the source. Sometimes, simply adjusting the transducer cable routing, separating it from power cables, can make a huge difference. If the screen is consistently blank or glitchy, check your power connection and fuses. Many modern units also have a reset option in their menu, which can often resolve software-related hiccups, getting you back to finding fish quickly. For deeper dives into specific solutions, the user manuals provided by manufacturers or community forums (which you might find discussing products available on Amazon) are invaluable resources.
Adjusting Settings for Different Conditions
The "auto" settings on your fish finder are a good starting point, but truly maximizing its potential means learning to adjust the settings manually for varying conditions.
| Setting | Purpose | When to Adjust |
|---|---|---|
| Sensitivity | Controls how weak or strong an echo signal is displayed. | Increase in deep or clear water; decrease in shallow or murky water to reduce clutter. |
| Frequency | Higher frequencies (e.g., 200 kHz) offer better detail but less depth. Lower frequencies (e.g., 50 kHz) penetrate deeper but with less detail. | Use high frequency for shallow water detail; low for deep water or identifying bottom hardness. Some units offer dual-beam or chirp sonar for the best of both. |
| Chart Speed | How quickly the sonar history scrolls across the screen. | Increase for faster boat speeds or when actively searching; decrease for slower trolling or when stationary to get more detail under the boat. |
| Range | The depth range displayed on the screen. | Set slightly deeper than the actual water depth to see what's below the bottom, or narrow it to focus on a specific depth zone where fish are holding. |
| Noise Rejection | Filters out electrical interference and clutter. | Increase if you're getting a lot of random dots or lines that aren't fish or structure. |
For example, when fishing in very shallow, murky water, you might need to reduce your sensitivity to prevent the screen from being overwhelmed with clutter. Conversely, when fishing in deep, clear waters, increasing sensitivity can help you pick up fainter signals from fish holding near the bottom or subtle thermoclines. Similarly, if you're moving fast, increasing the chart speed can provide a more accurate depiction of the bottom and fish as you pass over them. Don't be afraid to experiment with these settings; a few tweaks can make a massive difference in what you see and how effectively you locate fish.
Maintaining Your Device for Longevity
Like any piece of valuable equipment, your fish finder needs a little care to ensure it performs reliably for years to come. After each trip, especially if you’ve been fishing in saltwater or murky freshwater, give the transducer and display unit a quick rinse with fresh water to remove any salt, dirt, or grime. Use a soft cloth to wipe down the screen to avoid scratches, and never use harsh chemicals.
Ensure all connections are secure and free from corrosion, especially if your boat sits uncovered outdoors. If you notice any fraying on cables or cracks on the transducer, address them promptly to prevent water intrusion or signal loss. For winter storage, or if you won’t be using your boat for an extended period, it's a good idea to disconnect the unit and store it in a dry, temperature-controlled environment. Taking these simple preventative steps can extend the life of your fish finder and ensure it's ready to help you find fish on your next adventure, whether you're targeting specific species or enjoying the Virginia Free Fishing Days in June.
Disclaimer
This article is for general informational purposes only and does not constitute professional advice. Laws, prices and regulations vary by location and change over time. Consult a qualified professional for guidance on your specific situation.